Sticky Honey Garlic Chicken Tenders: A Sweet and Savory Delight!
Hey, friend! I’m so excited to share one of my absolute favorite recipes with you today: Sticky Honey Garlic Chicken Tenders! These tenders are not just delicious—they’re the stuff of kitchen dreams. Sweet, savory, and packed with flavor, they’re perfect for a casual weeknight dinner or a special gathering with friends and family. So, grab your apron and let’s dive into the delightful world of sticky chicken goodness!
A Taste of My Childhood
Let me take you back to my childhood, where the kitchen was filled with laughter and the tantalizing aroma of comfort food wafting through the air. One of my fondest memories is of my mom whipping up her famous chicken tenders on a cozy Friday night. The sizzle of the chicken hitting the hot oil, the sweet and garlicky sauce simmering away on the stove—it was pure magic. Those chicken tenders became a staple in our house; they were the centerpiece of our family gatherings, and the highlight of our week.
Fast forward to today, and I’m still chasing that magical flavor. I wanted to create a version that honors those childhood memories but with a fresh twist. That’s how these Sticky Honey Garlic Chicken Tenders came to be! They’re not just food; they’re nostalgia on a plate, a sweet reminder of family, fun, and the joy of gathering around the table.
Ingredients
Let’s gather our ingredients and get ready to create some magic in the kitchen! Here’s what you’ll need for your Sticky Honey Garlic Chicken Tenders:
-
2 pounds Boneless skinless chicken breast or tenderloins
Chicken tenders are the star here! You can use breast pieces or tenderloins for effortless eating. If you’re looking for a leaner option, chicken breast is the way to go! For a juicier bite, opt for the tenderloins. -
1 cup Panko bread crumbs (or regular bread crumbs)
Panko crumbs give the tenders an extra crunch and light texture. If you can’t find panko, regular bread crumbs will work, but they won’t be quite as crispy. For a gluten-free option, use crushed gluten-free crackers or almond flour. -
2 Eggs (beaten)
Eggs act as a binder, helping the breading stick to the chicken. If you need an egg substitute, try using unsweetened applesauce or a flax egg (1 tablespoon flaxseed meal mixed with 2.5 tablespoons of water). -
3/4 cup All-purpose flour (plus more if needed)
The flour creates a nice coating before the egg wash. If you’re avoiding gluten, feel free to use a gluten-free all-purpose blend. -
1 teaspoon Kosher salt
Salt enhances flavors and is essential! If you’re watching your sodium intake, feel free to reduce the amount. -
Fresh cracked black pepper (to taste)
Adds a little kick! You can always adjust the amount according to your taste. If you love a bit more flavor, toss in some garlic powder or smoked paprika for that extra oomph. -
Optional seasonings (crushed garlic, garlic powder, smoked paprika)
These are optional, but I definitely recommend them for added flavor! A little crushed garlic can elevate the dish to a whole new level. -
1/2 cup Ketchup
The base of our sticky sauce! You can use low-sugar ketchup if you prefer a healthier option. -
1/2 cup Honey
Pure, sticky goodness that adds sweetness and a beautiful glaze! You can swap honey for agave or maple syrup if you want a vegan option. -
1/4 cup Soy sauce (or fish sauce)
This adds a savory depth. If you need a gluten-free alternative, tamari works perfectly! -
1 tablespoon Chili garlic sauce (or other hot sauce, optional)
For those who like a bit of heat! If you’re a spice lover, add a bit more, or if you prefer mild flavors, feel free to leave it out. -
2 tablespoons Fresh lime juice (or rice vinegar)
The acidity from the lime juice brightens the dish. If limes are out of season, rice vinegar is a great alternative. -
1 teaspoon Cornstarch
This is essential for thickening our sauce and achieving that perfect sticky texture. If you’re looking for a low-carb option, you can omit it!
Gather these ingredients, and we’ll transform them into something truly yummy!
Step-by-Step Instructions
Ready to get cooking? Here’s how to whip up these Sticky Honey Garlic Chicken Tenders:
-
Preheat Your Oven: Preheat your oven to 400°F (200°C). This way, the tenders will get perfectly crispy as they bake. I recommend lining a baking sheet with parchment paper for easy cleanup!
-
Prepare the Chicken: If you’re using chicken breasts, slice them into strips or bite-sized pieces. This helps ensure even cooking and maximum crunchiness. Season them with a sprinkle of salt and fresh cracked pepper.
-
Set Up Your Breading Station: In one bowl, add the flour, kosher salt, and black pepper (plus any optional seasonings). In a second bowl, beat the eggs until smooth. In a third bowl, pour the panko bread crumbs.
Chef Tip: To make the process smoother, set up your bowls in an assembly line. This will help you bread the chicken quickly without making a huge mess!
-
Coat the Chicken: Take a piece of chicken and coat it lightly in the flour mixture, shaking off any excess. Then dip it into the egg mixture before transferring it to the panko bread crumbs. Press the crumbs onto the chicken to ensure a good coating. Repeat with all the chicken pieces.
-
Bake the Chicken: Place the breaded chicken tenders on the prepared baking sheet. Spray or brush them lightly with olive oil to help them crisp up while baking. Bake for about 15-20 minutes, flipping halfway through, until they are golden brown and cooked through.
Pro Chef Hack: For an extra crunch, you can turn on the broiler for the last 2-3 minutes of baking. Just keep an eye on them to avoid burning!
-
Make the Sticky Sauce: While the chicken is baking, make your sticky honey garlic sauce. In a small saucepan, combine the ketchup, honey, soy sauce, chili garlic sauce (if using), lime juice, and cornstarch. Whisk everything together over medium heat until well combined.
-
Simmer to Thicken: Bring the sauce to a gentle simmer, stirring frequently. Cook until it thickens and becomes syrupy, which usually takes about 3–4 minutes.
Quick Note: If you find the sauce too thick, you can always add a bit of water to get it to your desired consistency.
-
Glaze the Chicken: Once the chicken is done baking, remove it from the oven and drizzle it generously with your sticky honey garlic sauce. Toss the tenders in the sauce to coat them evenly.
-
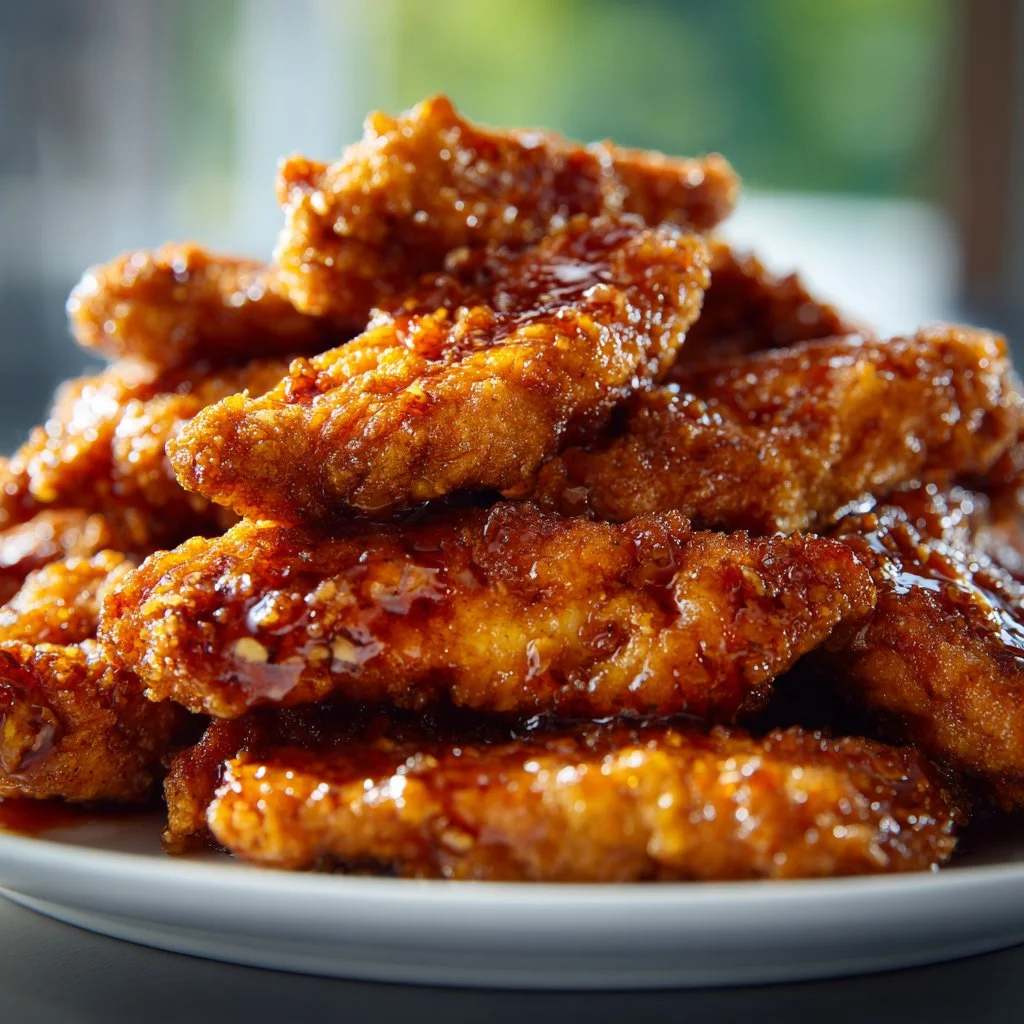
Finishing Touches: Transfer the glazed chicken tenders to a serving platter, and give them a final drizzle of sauce for visual impact!
Serving Suggestions
Now that your Sticky Honey Garlic Chicken Tenders are ready, how can you serve them? These tenders are perfect on their own, but why not elevate the experience? You can plate them with a side of roasted vegetables or serve them atop a fluffy bed of rice. They also make fantastic tacos—just layer the chicken in a tortilla with some crunchy slaw and a sprinkle of fresh cilantro, and you’ve got a crowd-pleaser!
Recipe Variations
Looking to spice things up a bit? Here are a few fun variations for your Sticky Honey Garlic Chicken Tenders:
-
Spicy Sriracha Twist: If you’re a spice lover, swap out the chili garlic sauce for Sriracha in the glaze. Trust me, it brings the heat!
-
Citrus Infusion: Add zest from an orange or lemon to the sauce for a zesty kick. It brightens the flavors beautifully!
-
Sesame Variation: Incorporate toasted sesame oil into the sauce for a nutty flavor that pairs perfectly with the soy sauce.
-
Baked Sweet Potato Fries: Serve your tenders with a side of baked sweet potato fries for a healthy, satisfying meal.
-
Gluten-Free Option: Use gluten-free bread crumbs and tamari sauce to make this recipe suitable for those who avoid gluten.
Chef’s Notes
Cooking these Sticky Honey Garlic Chicken Tenders transports me back to those Friday nights in my childhood kitchen! It’s funny how food has a way of being a time capsule, isn’t it? I love how this recipe has morphed over the years; it started out as my mom’s classic breaded chicken, and now it’s become a go-to in my own home with exciting twists and flavor dynamics.
Remember, cooking should be fun and open for experimentation. Don’t hesitate to make this recipe your own; add your favorite spices, or swap in seasonal ingredients!
FAQs and Troubleshooting
Here are some common questions readers might have when trying out this recipe:
-
What if my chicken isn’t chicken tender?
If you find your chicken is a bit tough, try brining it in a mixture of water and salt for about 30 minutes before cooking. This helps keep it moist! -
Can I fry the chicken instead of baking it?
Absolutely! If you prefer a fried version, heat oil in a deep skillet to 350°F (175°C) and fry the tenders in batches until golden brown. -
The sauce is too thick. What do I do?
If your sauce turns out too thick, just whisk in a little warm water until it reaches a pouring consistency. -
How do I store leftovers?
Store any leftover chicken in an airtight container in the refrigerator for up to 3 days. Reheat in the oven for the best texture!
Nutritional Info
This dish serves approximately four people. Each serving contains:
- Calories: 350
- Protein: 28g
- Carbohydrates: 40g
- Fat: 10g
(Please Note: Nutritional information can vary based on precise ingredient choices and measurements.)
Well, there you have it! My Sticky Honey Garlic Chicken Tenders are sure to bring joy to your kitchen and, hopefully, a flood of nostalgic memories like they have for me. Thank you for joining me on this flavorful journey today! I can’t wait to hear how yours turn out, so don’t forget to share your photos and variations. Now, gather some loved ones around the table, and let’s indulge in the magic of home cooking!
PrintSticky Honey Garlic Chicken Tenders

Sweet, savory, and packed with flavor, these chicken tenders are perfect for a casual weeknight dinner or a special gathering.
- Prep Time: 20 minutes
- Cook Time: 20 minutes
- Total Time: 40 minutes
- Yield: 4 servings 1x
- Category: Main Course
- Method: Baking
- Cuisine: American
- Diet: Gluten-Free option available
Ingredients
- 2 pounds Boneless skinless chicken breast or tenderloins
- 1 cup Panko bread crumbs (or regular bread crumbs)
- 2 Eggs (beaten)
- 3/4 cup All-purpose flour (plus more if needed)
- 1 teaspoon Kosher salt
- Fresh cracked black pepper (to taste)
- Optional seasonings (crushed garlic, garlic powder, smoked paprika)
- 1/2 cup Ketchup
- 1/2 cup Honey
- 1/4 cup Soy sauce (or fish sauce)
- 1 tablespoon Chili garlic sauce (or other hot sauce, optional)
- 2 tablespoons Fresh lime juice (or rice vinegar)
- 1 teaspoon Cornstarch
Instructions
- Preheat your oven to 400°F (200°C) and line a baking sheet with parchment paper.
- Prepare the chicken by slicing it into strips or bite-sized pieces and seasoning with salt and pepper.
- Set up your breading station with flour mixture, beaten eggs, and panko breadcrumbs.
- Coat the chicken in the flour mixture, then dip in the egg, and finally coat with panko breadcrumbs.
- Bake the chicken for about 15-20 minutes, flipping halfway through, until golden brown.
- Make the sticky sauce by whisking ketchup, honey, soy sauce, chili garlic sauce, lime juice, and cornstarch in a saucepan over medium heat.
- Simmer the sauce until thickened, about 3-4 minutes.
- Glaze the baked chicken with the sticky sauce and serve on a platter.
Notes
For extra crunch, broil the chicken for the last 2-3 minutes of baking. Can be served with roasted vegetables or in tacos.
Nutrition
- Serving Size: 1 serving
- Calories: 350
- Sugar: 25g
- Sodium: 800mg
- Fat: 10g
- Saturated Fat: 2g
- Unsaturated Fat: 8g
- Trans Fat: 0g
- Carbohydrates: 40g
- Fiber: 2g
- Protein: 28g
- Cholesterol: 70mg
Keywords: chicken tenders, honey garlic, sticky chicken, comfort food, easy recipe