Cheeseburger Bombs: Your New Favorite Family Dinner
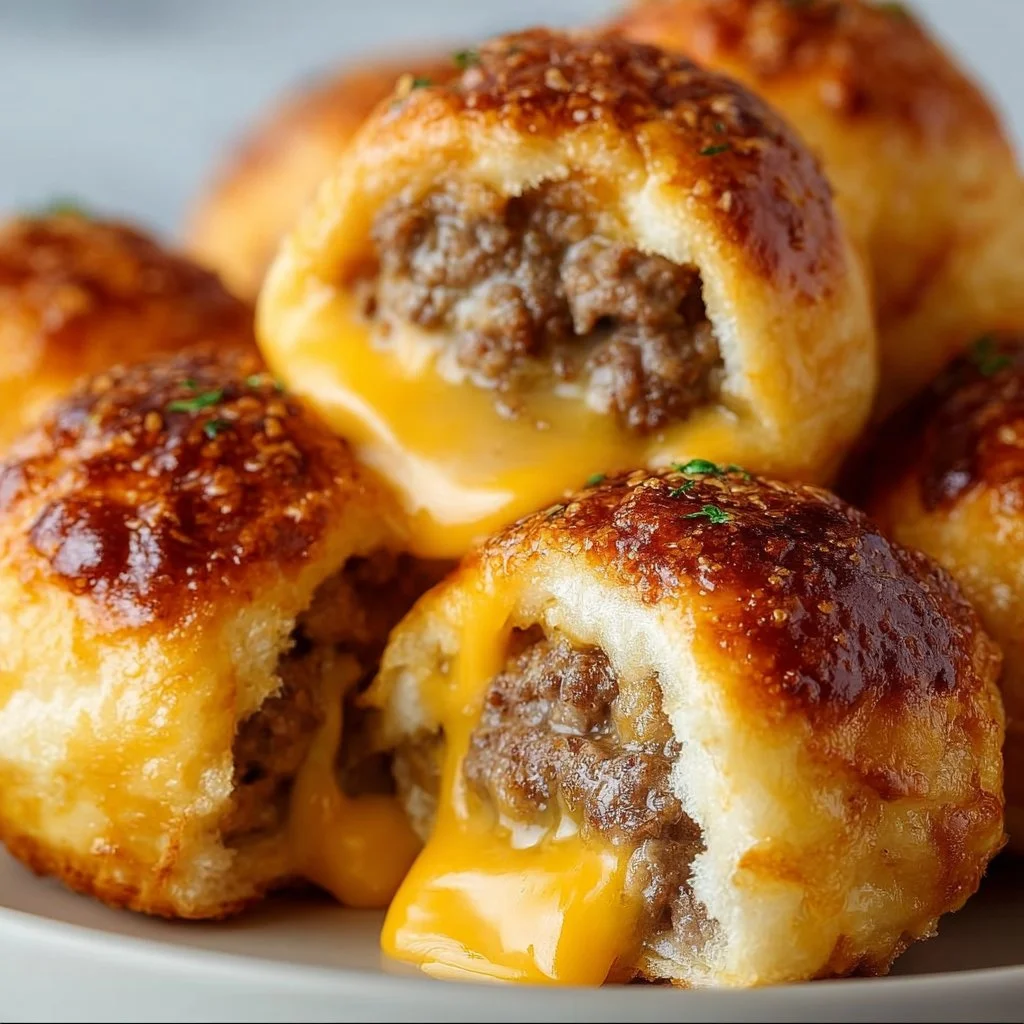
Hey there, fellow food lovers! If you’re anything like me, you crave meals that hit the sweet spot between comfort and creativity—something that makes you feel warm and cozy, even on the busiest of weeknights. Today, we’re diving into something that blends the best of all worlds: Cheeseburger Bombs! Imagine the ooey-gooey goodness of your favorite cheeseburger but wrapped in a buttery, flaky biscuit. Sounds enticing, right?
These delightful little pockets of joy are not only fun to make but also perfect for sharing with family or friends (or both!). Whether you’re huddled around a weekend movie night or throwing together a quick meal after a long day at work, these Cheeseburger Bombs will become a go-to in your recipe rotation. And the best part? They’re super easy to whip up, which means you’ll have more time to enjoy the final product—and we all know cooking should be a joyful experience!
So grab your aprons, turn on your favorite playlist, and let’s get ready to make some Cheeseburger Bombs! This recipe is packed with flavor, nostalgia, and just the right amount of magic to make your dining experience unforgettable. Ready? Let’s cook!
Personal Story
Growing up, my family was all about food that brought us together. If you walked into our house on a Friday night, there was a good chance you’d be greeted not just by the smell of something savory simmering away but also by bursts of laughter and the sounds of my siblings bickering over who got the last piece of whatever deliciousness was on the table.
One of my fondest memories is when I discovered the joys of cheeseburgers. My dad and I would often have little cookouts in our backyard during the summer. He instilled in me the secret art of grilling the perfect patty and the importance of finding that balance between a crispy exterior and a juicy interior. But the real magic happened when we started experimenting with toppings and flavors—thrown together with stories and jokes, every meal became legendary.
Years later, when I first tried these Cheeseburger Bombs, I was instantly transported back to those lovely summer evenings. The minute I took my first bite, I could practically hear the laughter echoing in the backyard. This recipe isn’t just about food; it embodies the warmth and joy that comes from gathering around the table with loved ones. Now, I want to share that same joy with you!
Ingredients
Here’s what you’ll need to whip up these delightful Cheeseburger Bombs:
-
1 pound ground beef
A classic choice for cheeseburgers, but feel free to swap it with ground turkey or chicken if you’re looking for a lighter option! -
1/2 cup chopped onions
Onions bring sweetness and depth to the dish. If you’re not a fan, consider using green onions or shallots instead for a milder flavor. -
2 cloves garlic, minced
Because who doesn’t love the aroma of garlic wafting through the kitchen? You can use garlic powder as a quick substitute if you’re out of fresh cloves. -
1 cup shredded cheddar cheese
Sharp or mild, it’s up to you! For a twist, try pepper jack for added spice or mozzarella for a gooey texture. -
1 tablespoon Worcestershire sauce
This adds a rich umami flavor. If you’re looking for gluten-free options, you can find gluten-free Worcestershire sauce or make your own! -
Salt and pepper to taste
Always essential! Don’t forget to season your beef well to elevate the flavor. -
1 package refrigerated biscuit dough
This is the magical little ingredient that wraps everything up! If you’d like a homemade touch, feel free to make your own biscuit dough. -
1 tablespoon butter, melted
Brushing the bombs with melted butter gives them that irresistible golden color and rich flavor—trust me, it’s worth it!
Step-by-Step Instructions
Now let’s get cooking! Follow these simple steps, and you’ll be enjoying Cheeseburger Bombs in no time.
Step 1: Preheat Your Oven
Preheat your oven to 375°F (190°C). This will get things nice and toasty while you prepare everything else.
Step 2: Cook the Ground Beef Mixture
In a large skillet over medium heat, add your 1 pound of ground beef and the chopped onions. Cook until the beef is browned and the onions are soft—about 5-7 minutes. Make sure to break up the beef as it cooks, so you have nice little crumbles.
Chef’s Tip: Drain excess fat after browning the beef to keep your bombs from getting greasy!
Step 3: Add Garlic and Seasonings
Once the beef and onions are cooked, add the minced garlic to the skillet. Stir for about 1 minute until fragrant. Then, stir in the Worcestershire sauce, salt, and pepper. Remove from heat and let it cool for a moment.
Step 4: Add the Cheddar
Next, fold in the shredded cheddar cheese to your beef mixture until it’s melted and well combined. Take a moment here to enjoy that cheeseburger aroma—so good!
Step 5: Prepare the Biscuit Dough
Now, take your packet of refrigerated biscuit dough and open it up—everyone loves a bit of dramatic flair when that package pops! Separate the dough into individual biscuits. If they’re too sticky, just sprinkle a little flour on your hands.
Step 6: Fill and Wrap
On a flat surface, take one biscuit and flatten it slightly in the palm of your hand. Spoon about 1-2 tablespoons of the beef and cheese mixture into the center. Carefully fold the edges of the biscuit over the filling, pinching to seal it well.
Chef’s Hack: If you want to make these extra special, consider adding a tiny dollop of mustard or ketchup inside before sealing them—just like you would on a burger!
Step 7: Brush with Butter
Place your filled bombs seam side down on a baking sheet lined with parchment paper. Brush the tops with your melted butter to help them turn that gorgeous golden brown.
Step 8: Bake
Pop them in the oven for about 12-15 minutes, or until they are golden brown and the biscuits are cooked through. The delicious aroma will soon fill your kitchen—get ready for the rave reviews!
Step 9: Cool and Enjoy
Once they are out of the oven, let them cool for a few minutes before serving. You won’t want to burn your mouth on that melted cheese, trust me!
Serving Suggestions
To plate your Cheeseburger Bombs, arrange them on a large platter, perhaps with a few garnishes like fresh chives or parsley for a pop of color. Serve them with sides of ketchup, mustard, or even a homemade dipping sauce for added flair!
Recipe Variations
- Cheesy Bacon Bombs: Mix crispy bacon bits into the beef mixture for an extra savory explosion.
- Veggie Bombs: Replace the ground beef with a mix of sautéed bell peppers, mushrooms, and zucchini for a vegetarian adaptation.
- BBQ Cheeseburger Bombs: Add your favorite BBQ sauce to the beef mixture for a smoky twist.
- Spicy Jalapeño Bombs: Toss in some chopped jalapeños with the beef for a spicy kick!
- Italian Style: Swap out the cheddar for mozzarella and add Italian herbs for an Italian-inspired twist.
Chef’s Notes
These Cheeseburger Bombs have become a staple in my kitchen! The first time I made them, I had a few friends over for dinner, and they disappeared faster than I could believe. I’ve experimented with so many variations—some worked beautifully while others flopped (let’s not talk about the time I tried avocado). But every attempt has brought laughter, smiles, and stories to the table, which is what cooking is all about, right?
As we gather around the table, it’s fun to reminisce about those backyard barbecues, and every bite of these cheeseburger bombs brings back the nostalgia and joy of those moments.
FAQs and Troubleshooting
1. My Cheeseburger Bombs are Burning on the Bottom—What Happened?
This could be due to your baking sheet getting too hot. Make sure to line it with parchment paper, and if you find they’re burning, lower the oven temperature slightly and bake longer.
2. Can I Freeze These Bombs?
Absolutely! Assemble the bombs and freeze them on a baking sheet. Once frozen, transfer them to a freezer-safe bag. Bake them from frozen for an extra 5-10 minutes when you’re ready to enjoy!
3. Why Are My Bombs Not Cooking Through?
If you’ve run into trouble with these not cooking through, it could be that the oven isn’t hot enough or they need a few more minutes. Always keep an eye on them and adjust the time as necessary.
4. Can I Use Whole Wheat Biscuit Dough?
For a healthier twist, feel free to substitute regular biscuit dough for whole wheat! Just remember that they might take a minute longer to cook, so keep that oven watchful.
Nutritional Info
For approximately 1 Cheeseburger Bomb (assuming this recipe yields about 10 bombs):
- Calories: 250
- Protein: 12g
- Carbohydrates: 20g
- Fat: 15g
- Sodium: Approximately 300mg
(Note: Nutritional values will vary based on specific ingredients and portion sizes.)
And there you have it—your ultimate guide to making delightful Cheeseburger Bombs! I hope this recipe brings warmth and joy to your kitchen, just like it has to mine. Remember, cooking is about experimenting and sharing the love, so don’t hesitate to make it your own. Happy cooking, and enjoy every bite! 🍔✨
PrintCheeseburger Bombs

Delicious cheeseburger filling wrapped in buttery, flaky biscuits, perfect for family dinners or movie nights.
- Prep Time: 15 minutes
- Cook Time: 15 minutes
- Total Time: 30 minutes
- Yield: 10 servings 1x
- Category: Main Course
- Method: Baking
- Cuisine: American
- Diet: None
Ingredients
- 1 pound ground beef
- 1/2 cup chopped onions
- 2 cloves garlic, minced
- 1 cup shredded cheddar cheese
- 1 tablespoon Worcestershire sauce
- Salt and pepper to taste
- 1 package refrigerated biscuit dough
- 1 tablespoon butter, melted
Instructions
- Preheat your oven to 375°F (190°C).
- Cook the ground beef and onions in a skillet over medium heat until browned, about 5-7 minutes.
- Add minced garlic and stir for about 1 minute until fragrant.
- Fold in shredded cheddar cheese until melted and well combined.
- Prepare the biscuit dough by separating it into individual biscuits.
- Fill each biscuit with 1-2 tablespoons of the beef mixture and seal.
- Brush with melted butter and place on a baking sheet.
- Bake for about 12-15 minutes until golden brown.
- Cool for a few minutes before serving.
Notes
These can be frozen and baked directly from the freezer; just add extra cooking time.
Nutrition
- Serving Size: 1 bomb
- Calories: 250
- Sugar: 1g
- Sodium: 300mg
- Fat: 15g
- Saturated Fat: 6g
- Unsaturated Fat: 8g
- Trans Fat: 0g
- Carbohydrates: 20g
- Fiber: 1g
- Protein: 12g
- Cholesterol: 50mg
Keywords: cheeseburger, comfort food, family dinner